
Assembling Your Arrows
Arrow Building How-To Part 4
Now that you have all the tools and components and your arrow shafts, you are ready to assemble your new arrows!
This part is fairly easy once you have everything all set up and laid out.
- Step 1: Cut arrows to desired length (typically a measurement can be taken by drawing the bow back with an arrow nocked and ensuring the broadhead/insert will be clear of the riser shelf). As mentioned in the previous post, it is good to have a pro shop help with this step as arrow cut off saws are quite costly.
- Step 2: Use your arrow squaring device to square both ends of your arrow. You can mark the carbon with a silver marker and keep sanding until there is only carbon showing.
- Step 3: I like to use a little Varsol to clean the end of the arrow (including the inside of the shaft) to prep for the insert glue.
- Step 4: Test fit the inserts and spin test your arrow before gluing your insert in place, by rotating your insert slightly you may be able to take a slight wobble out of the broad head.
- Step 5: Use a good insert glue and make sure to apply a good coat of glue to the insert. As you slide the insert in, spinning it around helps to distribute the glue evenly. Make sure to line up the insert the same way you identified while spin testing. Wipe away excess glue.
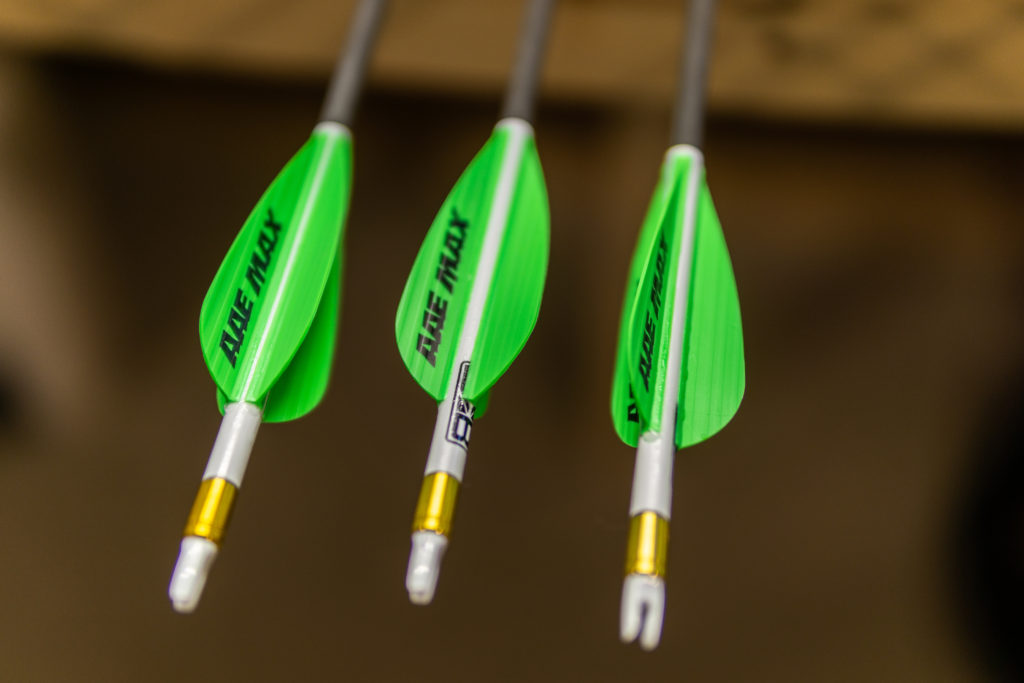
- Step 6: I use the AAE arrow cleaning wipes to clean the fletching end of the arrow shaft.
- Step 7: Using a magazine edge as a guide, roll on the arrow wrap and give the surface of the wrap a quick wipe with the AAE cleaning wipe as well.
- Step 8: Prepare your fletching jig. Make sure your desired offset is set on the jig, this can be done by laying a fletching on the shaft without glue to ensure proper contact.
- Step 8: Fletch the arrows. If using the AAE max models of vanes it is very important to use the AAE primer pen to clean and prep the base of the vane. Apply a thin even coat of glue to the base of the vane while it is clipped into the clamp. Attach the magnet to the jig itself and slowly press the vane down onto the arrow. Typically I hold the press for a few seconds and then let the clamp sit for 10 seconds before moving it. Repeat this step 2 or 3 more times depending on a 3 or 4 fletch setup.
Once your arrows have been built and fletched, I will typically let them sit overnight to allow the glues to set properly.
Now you are ready to test out your different fletching options, or if you used your go-to, time to go sight in your bow!
I have embedded a YouTube video of myself fletching an arrow to help make the above directions a little more clear.
Let me know if you like the video step by step as well!
-R

